Views / News – Blog

Solved: UK Date Format Issue on a new Apple Mac with Microsoft Excel:mac 2008

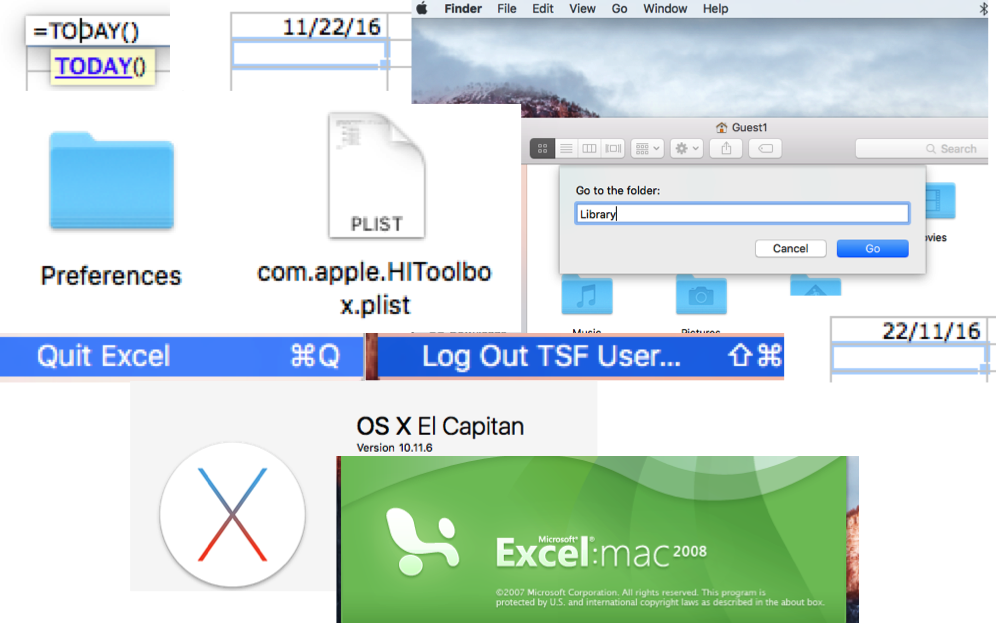
An annoying issue (for UK users) is of the date format defaulting to US (MM:DD:YY) rather than UK (DD:MM:YY). This occurs when transferring to a new Apple Mac computer with a previously correctly working installation of Microsoft Excel:mac 2008 (from an older computer, but running the same version of OS X). In theory, there should be no change, but hidden somewhere in the setup of the new computer lurks something preventing use of the UK date format.

The problem shows itself when, in a new Excel worksheet, a date is entered, e.g. using the formula =TODAY() returns something like 11/22/16 (for 22nd November 2016) instead of 22/11/16. Worse, if an existing workbook is opened, which had previously  correctly UK-formatted dates, they are all changed to the US-variation. A particular ongoing problem is then generated when new dates are added to the sheet, as entering 1/12/16 is then taken as 12th January not 1st December 2016.

 It turns out that the issue manifests itself in any User account set up on the Mac computer EXCEPT the ‘Guest’ account, which mysteriously sets the date to the UK-format. Hence this provides the clue to solving the problem. After some searching and trial-and-error, I have identified that the issue relates to the absence of a key file: com.apple.HIToolbox.plist, which for some reason is not created when setting up a new User account (and may not be copied across if importing from another computer). Luckily this file is created when opening the Guest account, which can then be copied across to all required User accounts.

Here is a detailed summary of the procedure I eventually used to fix this date format issue:

  1. Create and open a Guest Account (if not already enabled, go to Users & Group Preferences)
  2. Go to the Library folder (it’s a hidden folder, so to find it, use Finder to go to the home folder, then select from the menu ‘Go:Go to Folder’ and type in ‘Library’)
  3. Go to the Preferences folder
  4. Make a local copy of the file: com.apple.HIToolbox.plist (e.g. onto an SD card, or external/cloud drive)
  5. Now open your desired User account
  6. Go to your Library folder (again it will be hidden, so find it as above)
  7. Go to the Preferences folder
  8. Copy the file: com.apple.HIToolbox.plist (from local storage) into this folder
  9. Quit Excel and then log out of your user account, and then log back in
  10. Next time Excel starts, UK date format will be correct!

Repair of Panasonic DMR-EZ25 DVD Recorder

Panasonic DMR-EZ25 DVD Recorder

The DMR-EZ25 is a reliable and highly-specificationed DVD Recorder, and like several models made by Panasonic somewhat special by it’s capability of being able to use DVD-RAM disks (as well as the more common DVD-R and DVD-RW) for maximum flexibility of recording and playback.

This model does however sometimes fail, displaying various fault codes, preventing use but at least giving an indication of the likely problem(s). Fortunately, it is then relatively straight-forward to disassemble using just a screwdriver, and thereby replace (or repair) the relevant component modules.

Here are the full disassembly and reassembly procedures I followed to restore my unit, which had been displaying the fault code ‘U81’, to full working order by replacing the main PCB board.

Disassembly procedure

1. Remove top panel, removing 3 screws (normal, non-washer type) at rear and two on side (big).

2. Remove front panel, which pulls off once lugs are pushed back, being careful not to break lugs.

3. Remove HDMI board, removing one screw (normal type) and then easing it out of the black connector on the main board and the ribbon cable out of its socket on the digital board.

4. Remove the SD card board, removing two washer-type screws and the ribbon cable out of its socket on the digital board.

5. Remove the rear panel, removing 6 normal screws and 2 smaller machine screws by the SCART sockets, then unplugging the FAN connector cable from the PSU board (alternatively, you can leave this connector in place and lift the panel away with the PCB board).

6. Remove the PSU board, removing the three washer-type screws and easing the black power rail connector from its socket on the main board.

7. There’s no hard disk in the EZ25 model, other products have an extra step.

8. Release the digital board from its mounting frame, there are three washer-type screws (and an empty socket where a fourth one is not present), easing it out of its black connector socket on the main board hidden underneath and then fold it over onto the disk unit keeping the ribbon cables attached

9. Remove the DV input board, removing one normal-type screw.

10. Remove the digital board metal support frame, removing four washer-type screws.

11. Remove the power button pcb, removing the washer-type screw and sliding it from the lugs being careful not to pull the ribbon cable.

12. Remove the main board, removing the four washer-type screws and the ‘hidden’ normal type screw on the front by the AV sockets.

13. The remaining disk drive unit removes from the base panel, removing two washer-type screws and lifting out with the digital board (which can be disconnected if necessary by careful detaching of the ribbon cables).

Re-assembly procedure

1. Insert main board into chassis (and also the disk drive if removed, with digital board, with two washer-type screws). There is a lug to align into a hole at the front left edge, one at the front right side and a bent lug at the rear to slide under. A ‘hidden’ (non-washer type) screw is located at the front by the phono sockets, and four more screws secure the main PCB to the chassis, all are ‘washer-type’.

2. One screw secures the power button PCB, aligned with two lugs.

3. Five screws secure the metal frame for the digital support board.

4. One (non-washer) type screw holds the DV input board which needs aligning with the holes in the main board at the front next to the phono sockets.

5. The digital board flips over with its ribbon cables in place, mounts onto the frame, tucking under the lugs, slotting the DV input board into place and pressing down onto the main (black) connector underneath.

6. Three screws secure the digital board in place (a potential fourth, in the far right corner (away from the front panel) is not present.

7. No hard disk is present in the DMR-EZ25 model (different models have this extra step).

8. The power PCB is placed into position, and it’s power rail connector presses together. Three screws secure it in place.

9. The rear panel clips securely in place. Six screws secure it, all ‘non-washer’ style and two ‘machine-type’ screws locate between the SCART sockets . The connector for the fan presses in place.

10. The SD board mounts at the front onto the digital board, with a lug and two ‘washer-style’ screws. It’s ribbon cable presses in place.

11. The HDMI board slots into place onto its black connector and its ribbon cable slots into place on the digital board. A screw on the rear panel secures it in place.

12. The front panel clips in place.

13. The top panel pushes on, slides in place and is secured by three non-washer type screws on the rear and two large flat screws on the sides.

Photos (including views of the component modules from inside the product) of this repair project are on our Facebook page.

Vero Trivolt PSU – ‘product of the month’

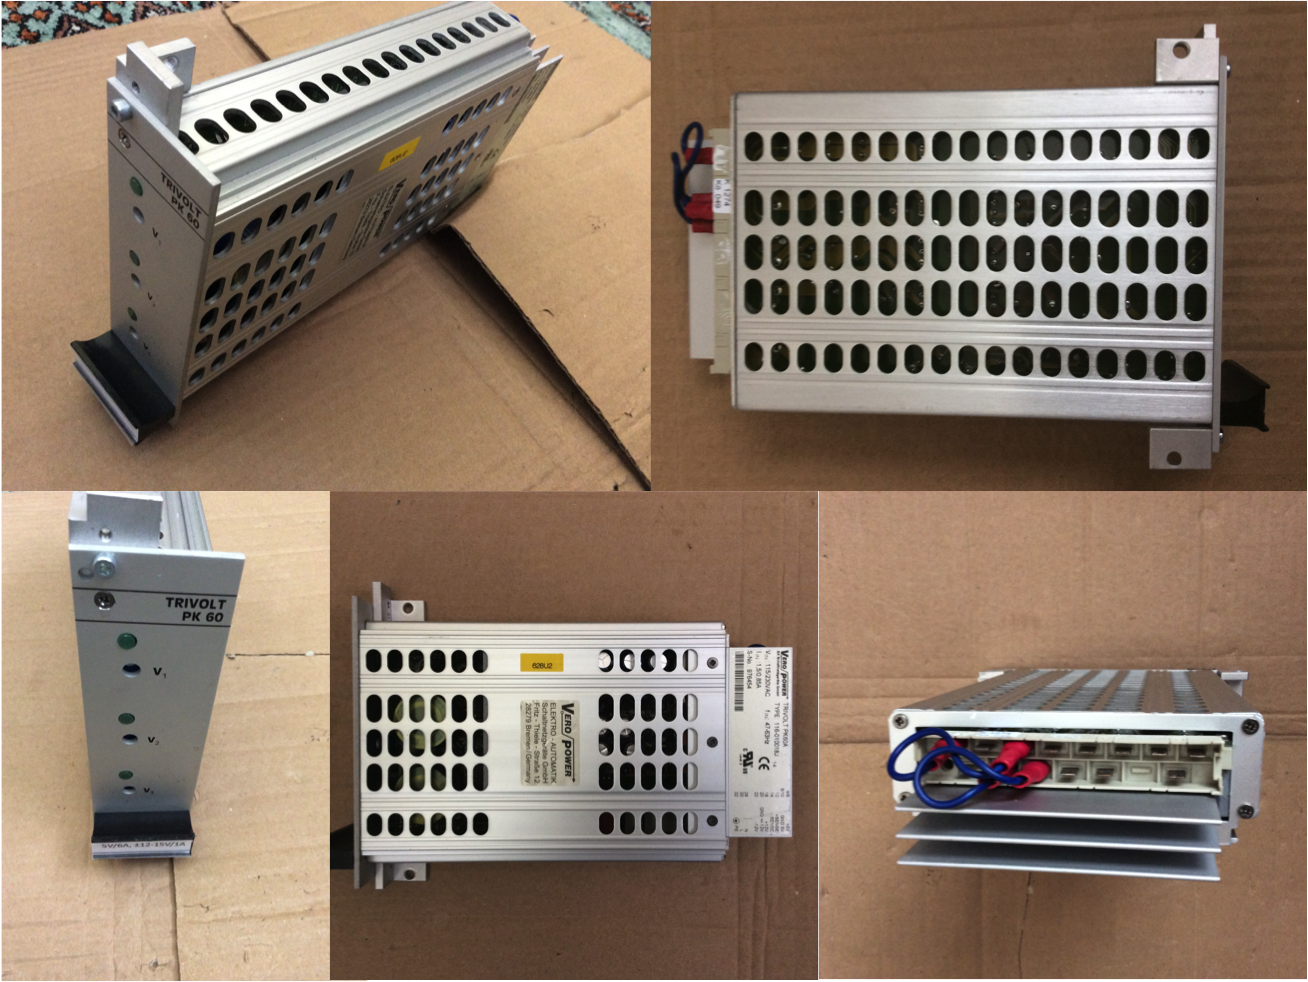
TRIVOLT AC/DC-converter Power Supply Unit

Manufacturer: Vero

Model Number: PK60A

Product Code: 116.010018J

Description

60 to 120 Watt switched mode AC/DC plug-in power supply with three outputs in 3 U Eurocassettes for use in 19” subracks to IEC 60297-3.

  • 3 high stability outputs, all adjustable
  • √  Safety approvals to UL, cUL and EN 60950
  • CE marked for compliance to EMC and Low Voltage Directives
  • SENSE-operation (5V output)
  • Overvoltage protection (OVP)
  • Powerfail signal optional
  • No-load and short circuit proof
  • Coded H15 connector
  • VERO standardised pinning

Specifications

  • nom. height: 3U
  • nom. width: 8H
  • nom. depth : 160mm
  • output power: 60W
  • voltage outputs:
    • V1: 5V/6A
    • V2: -12-15V/1A
    • V3: -12-15V/1A

To purchase, contact us.

Dual Beam Oscilloscope project

I am pleased to announce ‘finally’ the completion of this construction project which dates back to 1991, when it was first commenced and then ‘shelved’ for a quarter of a century. Returning to it, the most amazing thing was the intact condition of the mechanical build and electronic components, as well as the paper notes and Silvine Originals exercise book (thank goodness, what chance would an electronic ‘soft’ copy had it existed be readable now?) which had been preserved perfectly despite various moves and long-term storage.

It’s based on a design by John Becker published in Practical Electronics magazine, which appeared in three parts from November & December 1988 to January 1989. The magazine title subsequently merged with Everyday Electronics to form Everyday Practical Electronics (EPE) (and then later absorbed Electronics Today International) which survives today.

The project itself comprises the build of three main electronic elements, forming the three parts of the published design: PSU, Time-Base and Y-Drive. Coupled with these is the mechanical housing to enclose all the elements, and not least is the inclusion of a Cathode Ray Tube (CRT), which provides the traditional display device for the instrument.

Mechanical Housing

This element of the project needed to ‘come first’ as it forms a fundamental part of the construction, not only containing the PCBs of electronics but also serving as the mounting frame for the necessary controls, switches, inputs and outputs, including the display screen formed from the CRT tube. Naturally finishing this stage, including the wiring of all parts, had to wait for the completion of the PCBs and so was the ‘last part’ as well.

A suitable 19” rack style box was chosen, providing more than sufficient enclosing space, the actual constraining factor was the necessary size of the front panel. The template provided from the magazine notes was photocopied and enlarged several times from the published artwork to produce a ‘full size’ design which was then stuck to the front panel of the housing. This then enabled all the holes for the parts to be marked and drilled, including the large circular hole (formed by drilling a series of small holes in a circle) for the CRT face, which was then smoothed and lined with a split insulator from cable. The final touch to the front panel was the display screen, which was again photocopied from the magazine template, this time onto clear plastic and later pin-mounted over the CRT face hole.

Two of the PCBs (Time-Base and Y-drive, once built) were later attached to the rear of the front panel via their panel-mounting control switches, and the PSU PCB was fixed to the floor of the enclosure, as was the mains transformer. To the rear of the enclosure a mains socket, fuse and on/off switch were mounted. The CRT was mounted on a bracket composed of pipe clips and packaging tray and positioned so that the face would meet the front panel hole for the display.

PSU PCB

The complete power supply is formed from a PCB plus transformer to convert standard 240V AC mains supply into the +/- 5V low voltage DC supplies required by the rest of the project, and +HT 250V and –HT 350V DC supplies for the CRT display as well as a 6.3V AC supply for the CRT heater. Also produced is a 2.5V (peak) 50Hz reference signal, and focus and brilliance control voltages for the CRT.

The Mains input consists of ‘kettle lead’ socket, fuse and on/off ‘neon’ switch which were wired to the primary of the transformer, which provides secondary windings of 1x 250Vac (for the +/- HT) and 2x 6.3Vac (for the +/- 5V supplies and CRT heater voltages).

A purpose-made PCB contains all the other PSU components, including rectifier diodes, smoothing capacitors, voltage regulators, resistors and variable resistors (for adjustment of the +HT and 50Hz reference output voltages) and drive transistors, producing the HT and stabilised 5V supplies.

The construction and testing of this stage was the most personally challenging element of the project given the presence of high AC voltage and even higher DC; the +/- HT combination required to drive the CRT display amounts to 600V! Hence extreme care was made building and testing, and probing the voltages was done with much due respect and caution!

The main ‘trouble-shooting’ required at this project stage was the diagnosis of a failed drive transistor (BF259); hardly surprising since this component is responsible for the production of the +HT 250V supply, and care was needed to avoid a short circuit whilst building and testing.

Once the PSU itself was working, four ‘temporary’ 1M ohm potentiometers were wired to the CRT base to control the X and Y deflection plates. This enabled the testing of the Tube supply circuit, allowing manual up/down and left/right movement of the ‘spot’, and well as the two permanent 1M potentiometers providing the focus and brilliance controls.

Time-Base PCB

The most complicated part of the electronic design is contained with the Time-Base PCB, providing the horizontal sweep oscillator creating the left-right ‘motion’ of the beams. For the subsequent ‘fly-back’ of the X-axis beam, a saw-tooth waveform generator is employed. A collection of circuit stages make up the various elements of the required Time-Base functionality.

The Ramp-Generator circuit consists of six capacitors selected by a switch to produce a range of ramp rates, with a variable resistor providing intermediate rate variation. As the selected capacitor discharges, the first-stage comparator IC output goes high, tripping the second-stage comparator IC output high. As the capacitor charges, the first stage comparator IC output then go low, but the second-stage comparator IC initially is held high by a diode, until a transistor goes off, tripping the comparator low and starting the repeat of the sequence.

The Sync-Retriggering circuit controls the Ramp Generator, since capacitor discharging only occurs if the diodes in this stage are grounded, which occurs when a clock pulse from an internal Pulse IC or external source causes the 4013 (dual D-type flip-flop) IC output to go low. Hence the ramp is synchronised. Switches select between +/- and external/internal trigger sources, with a variable resistor setting the correct trigger level. The external sync is decoupled and limited by capacitors, resistors and diodes to the +/- 5v power levels.

The Inhibitor circuit ensures that each X-trace sweep begins at the same position. At the end of the trace flyback with the ramp generator comparator IC output going low, the output of the inverting Schmit IC goes high. A positive pulse across a capacitor resets the Sync-Retriggering 4013 IC, inhibiting the Ramp Generator operation. The Ramp starts again after the next clock pulse from the Sync-Retriggering Pulse IC.

The Auto-Retriggering circuit provides the X-trace sweep in the absence of an external signal for sync. The ramp of the X-trace restarts via a diode when the external/internal switch is closed without the need for an external signal; with the switch open, external sync only occurs. A switch selects one of six capacitors which charges once a 4013 IC output goes high until the inverting Schmit IC trips, causing its output to go low and enabling a discharge path for the capacitor via a diode. Thus the switch-selected capacitor provides sync until pulse occurs.

The CRT circuit provides the required boost to drive the 7cm display, since 21V per cm on for one plates and 37V per cm on other plates results in 147V and 259V needed; +HT of 250V is utilised. The output voltage from the Ramp Generator first-stage comparator IC is fed via a resistor and variable resistor, setting the full ramp range output, to the base of one half of a push-pull transistor pair, which provides the HT voltage to one CRT X-plate; the other is supplied by the other transistor controlled by another resistor and variable resistor, varying the screen trace position..

The Flyback-Blanking circuit ensures the beam is not displayed on the right-left ‘return journey’ by providing -50V to the CRT grid, with respect to the cathode. When the Ramp-Generator second-stage comparator IC output goes high, a BF259 transistor goes on, and a negative pulse occurs across a capacitor, with a diode limiting the positive going pulse edge.

Trouble-shooting this project stage was concerned with obtaining a working oscillator, which was achieved once some overflow solder was removed from the transistors and the -5V supply connection restored. The X-plate connections to the temporary potentiometers were removed to allow the Time-Base to drive the CRT display, with the panel mounted potentiometers centering the trace and adjusting the width across the screen.

Y-Amps/Drive PCB

Two key elements form the final PCB. The first are the two identical amplifier stages for the two Y-inputs, the components for which are duplicates. These are then combined using a ‘beam-split’ function fed from the Time-Base second-stage comparator IC to form the dual traces, with each channel then driving in turn the Y-plates of the CRT.

The Input signals to each of the Y-amps are switched for AC decoupling or DC pass-through, with diodes limiting the inputs to the +/- 5V power lines. A switch selects between three resistors to provide an attenuation stage of normal, one tenth and one hundredth; a non-inverting Op-Amp IC provides a gain stage and buffer, with a further three resistors offering selection between gains of 10, 50 and 100.

For both Y-amp channels, the output is brought to a switch to select either for the Time-Base sync. Following the Op-Amp IC, panel-mounted potentiometers control the signal level through a 4066 IC to drive one half of a transistor pair (similar to the push-pull transistor pair of the Time-Base PCB) for the vertical drive of the CRT Y-plates. The offset position is adjusted by two more panel-mounted potentiometers, allowing the Y-position of each trace to be independently positioned vertically.

The Beam-Split circuit takes the output from the Time-Base second-stage comparator IC to the input of a 4013 flip-flop IC, providing twin outputs of opposing logic levels. Each time the input goes high, the pulse triggers the 4013 IC into its next state. This feeds the control pins of gates which when open allow analogue signals to pass unattenuated. The gate outputs are commoner and fed to the Y-position to other half of the transistor pair driving the CRT Y-plates.A panel-mounted switch controls the displays modes, allowing dual or single Y1/Y2 by forcing one of the gates closed, or alternatively divert in the Y2 amp input to the X-plates in place of the sweep generator, for the display of ‘Lissajous’ figures.

Trouble-shooting this project stage discovered an error in the orientation of the diodes which were pulling the +/-5V supplies together. This was as a result of the use of an analogue multimeter displaying the opposite polarity result when switched to the “resistance” function, with the black lead positive (+) and the red lead negative (-) because it is easier to manufacture it that way!

The Y-plate connections to the temporary potentiometers were removed to allow the Y-amps to drive the CRT display, with the panel mounted potentiometers providing movement up/down the screen.

Control Wiring

Once complete, the Time-Base and Y-Drive PCBs were mounted onto the back of the enclosure front panel via their PCB / panel-mounting control switches, and all potentiometers, switches and sockets wired to provide the necessary controls for X and Y adjustments.

Trouble-shooting this final part found nothing from the 50Hz reference output, which was traced to a loose connection on the socket. Once properly connected, this output was used to verify and adjust both traces, demonstrating the oscilloscope project to now be fully functional!

CRT and final thoughts

The most specialised component of the project is the CRT, which of course was once common-place in consumer TVs, now almost completely replaced by LEDs and Plasma displays. The age of this project is therefore naturally reflected in the use of a CRT, but even then it was quite a special component, being of modest size and ideally suiting the instrument. Indeed it was the availability of this device which enabled Practical Electronics to provide the design; prior to that only surplus display tubes just after the war made such projects feasible, which became increasingly hard to find..

The almost certain lack of such components now means a modern design would need a completely fresh approach, making this project now very special indeed. I doubt that there could be very many others in existence, not including commercially produced products. Hence it is therefore particularly satisfying to have completed and made working this (probably) unique project challenge!

Photos (including views of the components inside the enclosure and of screen traces) of the completion project are on our Facebook page.

Spares Solutions

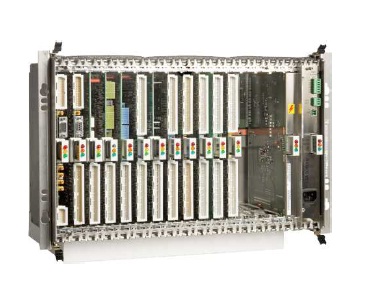
Legacy Infrastructure Hardware Elements

Can we help you with sourcing any equipment or spare parts for old legacy or even new infrastructure systems?
 
Many customers are needing to keep systems and infrastructure maintained to prolong asset life. This is particularly important for ‘legacy’ equipment that is approved for use and very reliable but in many cases no longer manufactured.
 
So here’s the solution: speak to the team at YellowsBest about anything you need to source to keep your systems in operational service.

Equipment Types 

– telecommunications hardware infrastructure products
 
– technologies including optical transmission, PDH, SDH, C/DWDM, microwave radio, PMR / TETRA
 
– software solutions including OSS / NMS
 
– IT equipment including personal computers and server hardware
 
– ancillary equipment such as power supplies, filters, monitoring devices, consumables
 
– cabling, wiring looms and connectors

 Vendor Systems

– Alcatel / Lucent e.g. 1511 Max
– ADVA e.g. WCM, CMDXM
– Apple e.g. PowerMac G5 / Pro
– Benning e.g. MCU1000
– Bosch e.g. DSK
– Brocade / Foundry e.g. 10G
– Ciena e.g. SM-A, CM-A
– Cisco e.g. ISR 4300 series
– ECI Telecom e.g. OPBFC
– Eltec e.g. AL 175 NT
– Ericsson e.g. OMS 846, 860, 870, 1600
– Ernitec e.g. M2504 M/2
– Extreme Networks e.g. Summit
– Keymile e.g. UMUX, UNEM, XMP1
– Huawei e.g. M1000
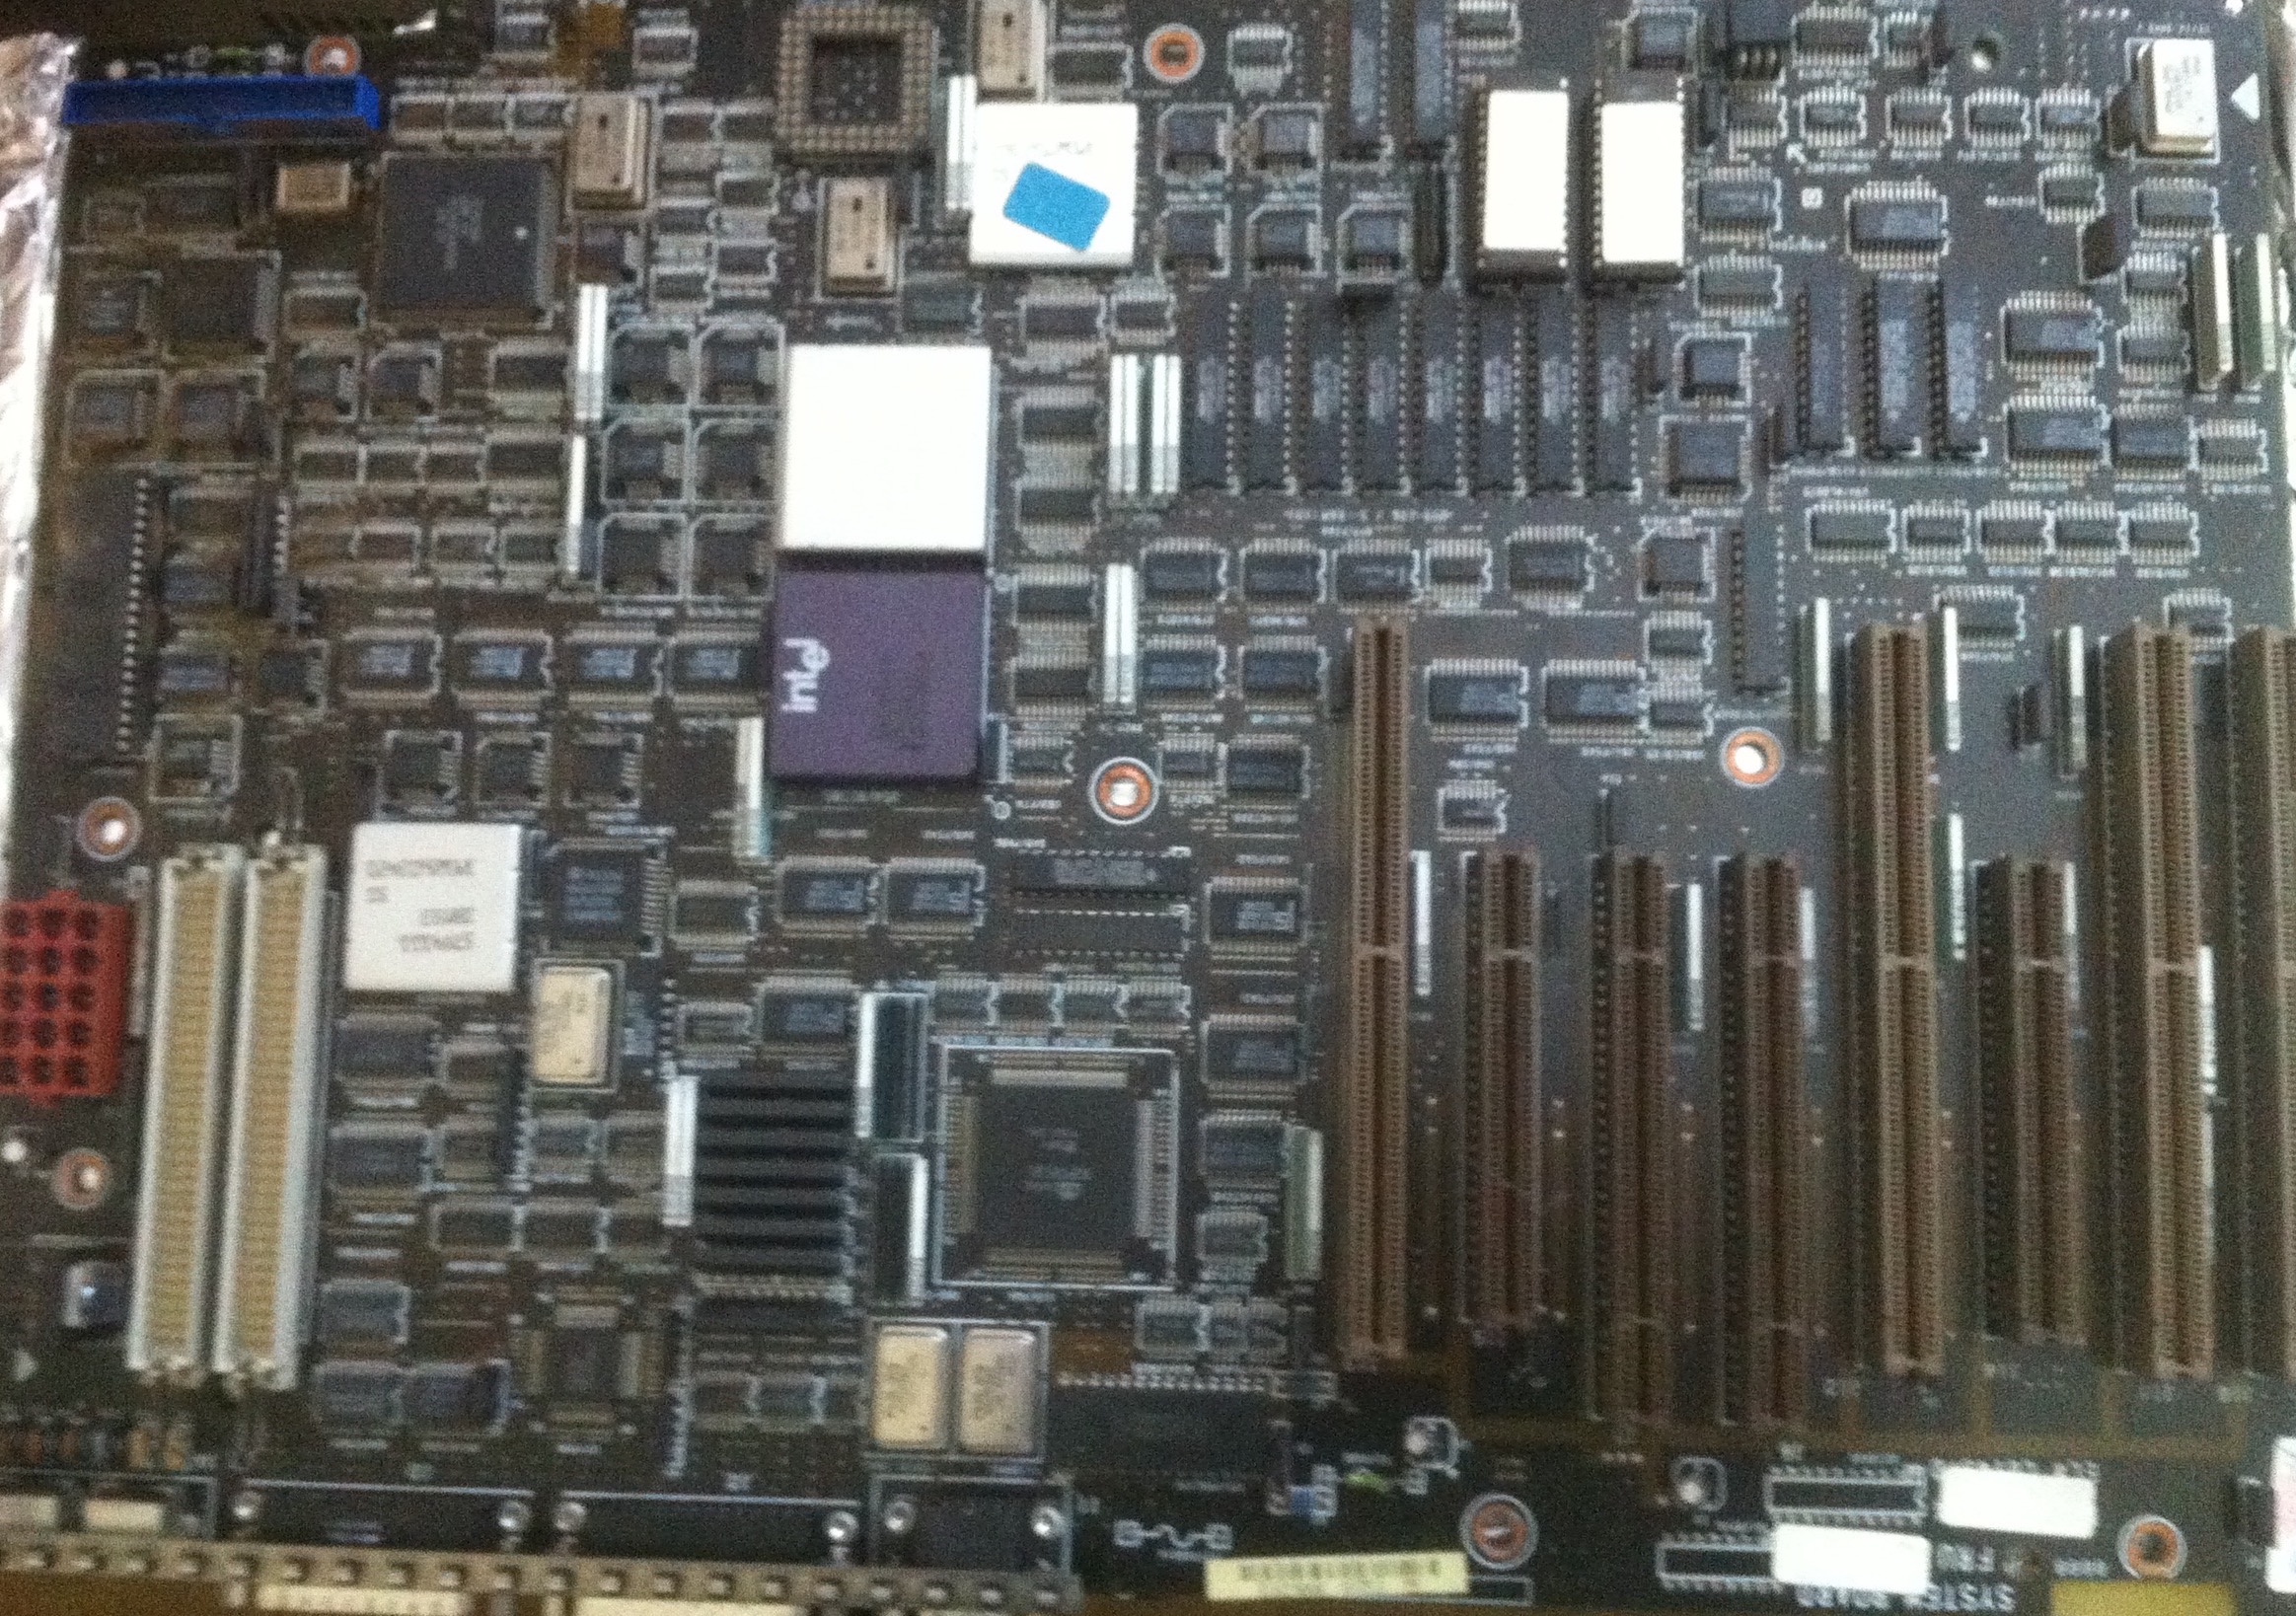
– IBM e.g. PS/2 Model 80
– Juniper e.g. SRX5400, EX3300
– GEC / Marconi e.g. SMA SDH
– MRV e.g. EM 316, 1600, 2003, 2004
– Newbridge e.g. MCP, CEB, TDS
– Nokia Telecommunications e.g. Dynanet PDH DM2 DB2 DN2, Synfonet SDH TSW0, NMS/10, NMS/100, DX220
– Nokia Siemens Networks (NSN e.g. Surpass HIG1100, HIE9200, HIQ8000 
– Nortel e.g. OTR, OCLD
– RAD e.g. Megaplex, ETX, ASMi, RADview
– Tellabs e.g. DM8, MX8
– Thomson e.g. Speed Touch
– Transmode e.g. MDU, OCU
– 3COM e.g. Baystack
 
Normally parts will be ‘2nd user’ working condition, where new items can no longer be sourced, but in some cases unused ‘last time buy’ surplus stocks or even remanufactured items can be supplied. 
 
Please check your services and solutions requirements. If there is anything you need, please contact us to discuss how we may be of assistance to your organisation.

PC Restoration

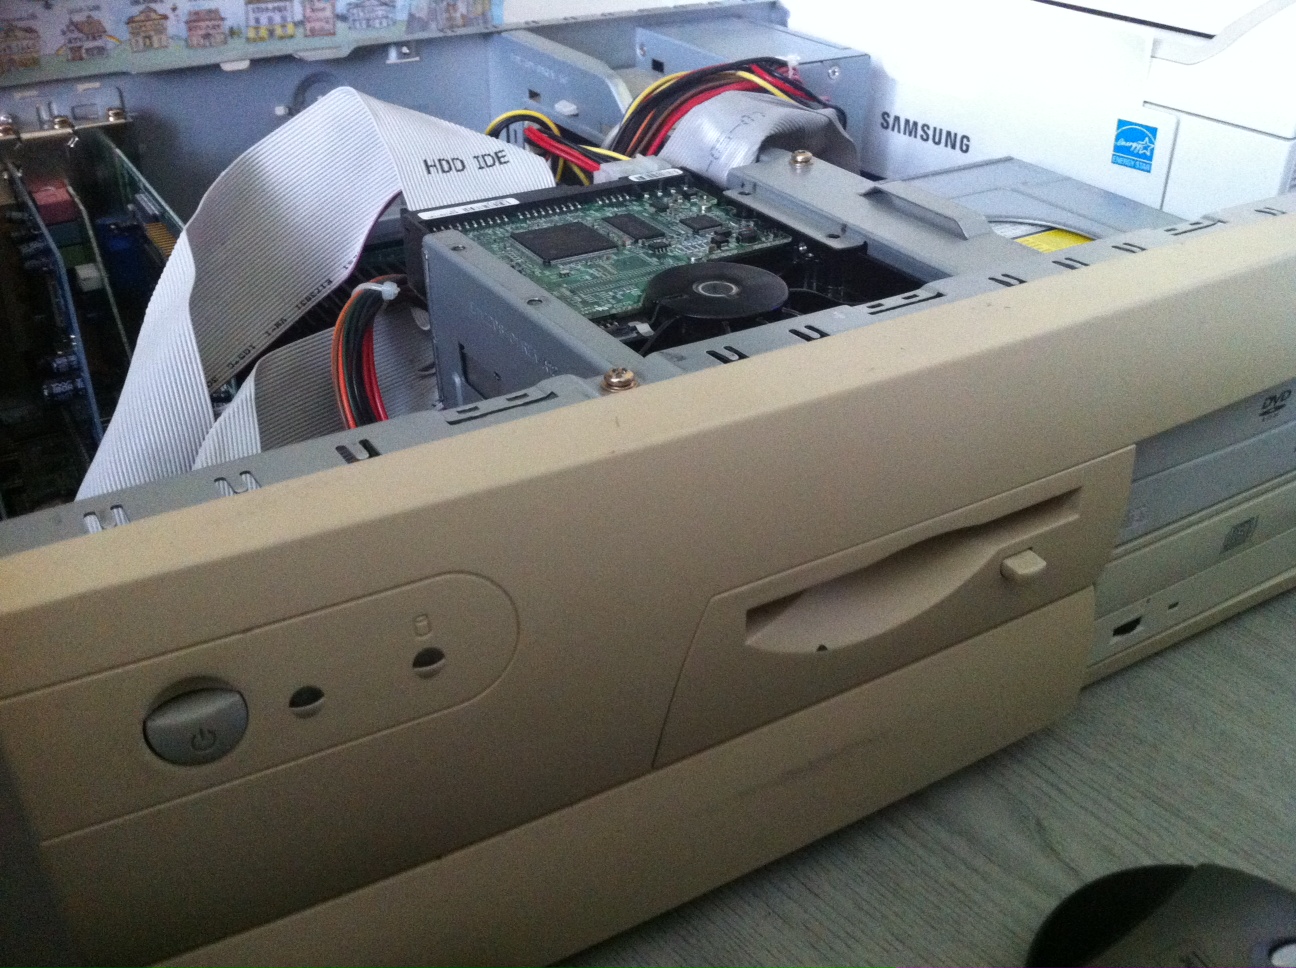
Managed to get this old Pentium III PC back to working order. It had been working fine, and I had been successfully getting it to boot into both Windows XP and Windows 95 by swapping hard drives, but then it completely stopped working.

Initially it didn’t look promising. Computer seemed to be powering up, but no video was being displayed on the monitor. Worse, it wasn’t even accessing the floppy drive on power up, let alone either of the hard drives. So I went through these steps:

Step 1 – Tried clearing the CMOS – BIOS memory. Found out there’s 2 ways of doing that; by reseating the cell-sized CMOS battery, or by moving the CLEAR CMOS ‘jumper’ on the motherboard from the pins it was on to the other pins. I tried both, but that didn’t do anything (later on I had to restore the BIOS settings, so it was a shame to have to try that).

Step 2 –  Tried testing the power supply. Even though power was clearing getting to the PC, since the ATX PSU generates several different voltages, it could be just that one part had failed. So with an AVO multimeter, I went through and checked all the outputs: +3.3V, +5V, +12V, -12V on the 20pin connector, with pins 15 & 16 shorted together (to ensure power on even whilst not connected to the motherboard). All checked out ok.

Step 3 – Tried ‘reseating’ everything possible in the PC. i.e. disconnected all data and power cables, took out all the interface cards, the memory module and the keyboard and mouse connectors. This step generated some progress, as now a loud ‘beep’ was heard on power-up. There are a series of different ‘beep codes’ which can indicate issues. After a bit of experimentation, I found that reseating the memory module again got rid of the ‘beep’ and even better caused a default startup screen to appear.

Step 4 – Even though it was ‘progress’ to get some video out, the PC still wasn’t booting into the Operating System, so I now suspected that I needed to restore the BIOS settings that had been reset with the CMOS clearing step. Pressing F2 on power up took me to the BIOS configuration page. That included seeing the date and time, changing the default setting for diagnostics on boot, and crucially manually setting the cylinder/head/sector parameters of the IDE HDD (as ‘auto-detection’ wasn’t working). This last part needed the right information about my hard disk to get to work, but fortunately I managed to find the exact information by booting with a Maxtor disk utility floppy disk (normally used for formatting, but it told me the parameters I needed).

With all that done, the booted successfully again into both Windows XP and Windows 95, job done!

Photos of the restoration in progress are on our Facebook page.


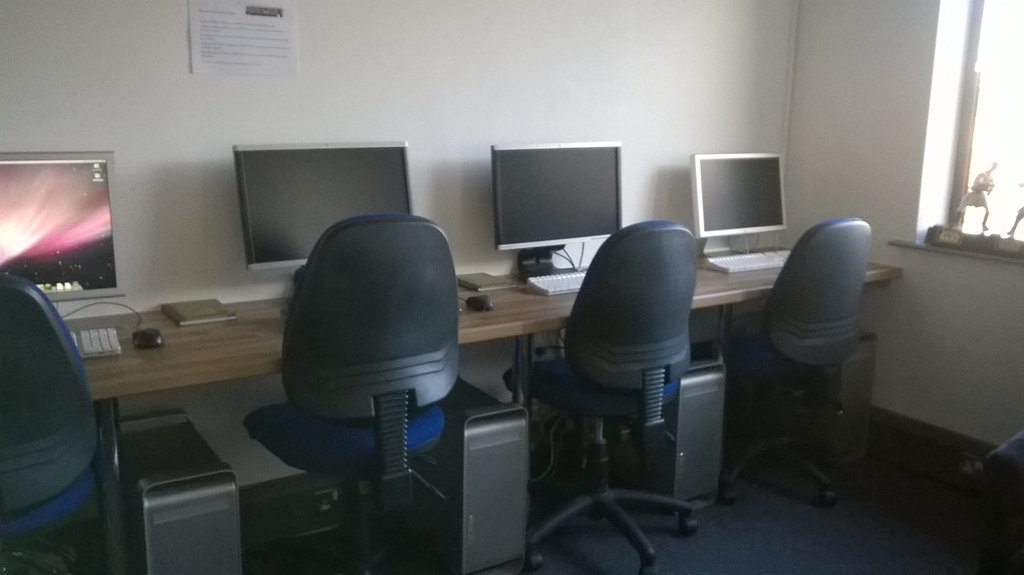
Action4Asperger’s : 4 PowerMacG5 : 4 Minecraft

Computers 4 Minecraft

Action for Asperger’s were delighted to receive a donation of four Apple Mac Computers for their CyberHub. The main use is planned to be for their Minecraft club.

Challenges

– The PowerMacG5’s needed setting up, removing the old user data and updating from an old version of MacOSX

– It initially appeared that Minecraft would not run on the old G5 systems since MacOSX development for those platforms ended.

Setup

The initial setting up of the PowerMacG5s took a surprising amount of time, since not everything was in order, with a mixture of old PC hardware and mice, cables, monitors, not all confirmed as working.

The computers had old user data and accounts, some with not-known passwords, meaning they couldn’t be booted into.

Most worrying was one of the PowerMacG5 computers had a sticky note saying ‘faulty – no hard-disk’. Fortunately, all the others had two drives each.

Two Apple ‘Cinema’ displays were included, at first one of them didn’t work, but it seems that it needed careful matching with the PSU as there were two types.

MacOSX ‘Leopard’ Upgrade

The last Apple operating system that works on the old PowerPC G5 computers is MacOSX 10.5.8 ‘Leopard’.

Fortunately, it was possible to create a suitable build from original install disks – a very handy fact is that 10.5.8 runs on both PowerPC and Intel Apple Computers, assisting with creating the build on a firewire portable disk. It was important to use a Firewire external drive, as PowerMacG5s will boot from an Firwire external drive (but not USB) by holding the ‘Alt’ key on power-up

Disk Utility was used to clear the one of the drives of one of the PowerMacG5s. Then CarbonCopyCloner was used to transfer the 10.5.8 build from the external drive to the computer.

Once the new build was transferred to one PowerMacG5 hard-drive, and whilst the external drive was used to upgrade another of the 4 computers, Disk Utility and CarbonCopyCloner was used to transfer the first computer’s primary to its secondary internal hard disk (handy it had two). This step helped to speed up the process, as once this disk copy was done, the secondary drives this computer and another of the 4 computers were swapped. Now two more build transfers could happen together.

The final step was to get the ‘faulty’ 4th computer to work. Opening it up and inserting the upgraded secondary drives from one of the other computers, it was possible to startup and set the boot drive, which brought it into operation. Even ran TechToolDeluxe which proved it was all ok.

Minecraft

Finding a version of Minecraft that works on the PowerPC G5 computers, even upgrade to the latest possible MacOSX 10.5.8 ‘Leopard’, took some considerable internet searching.

But happily, the 1.5.1 launcher was found and downloaded.

This ‘Legacy’ Apple Cider – PowerPC Minecraft Solution ‘legacy’ launcher allowed Minecraft to work on all the computers which also allows different accounts to network together, though it seems that they won’t interwork with PCs running a newer version. More investigation might be needed if this is desired in the future.

Finishing Up

The final step was to tidy up the ‘rats nest’ of cables and computers, discovering that some of the combinations of display, keyboard and mouse worked better together e.g. an apple mouse with a very short lead is a better fit with the apple keyboard which has a USB port.

All done, and the result was very satisfying indeed. Hopefully plenty of use will be gained from the updated ‘Cyber-hub’.

Photos of the upgrade project during its progress are on our Facebook page.

Account Management assistance

If you have a backlog of work to invoice, payments to chase and clients to speak to about renewing their purchase order cover, you may need another Account Manager.

Especially if you also need to provide reports internally on status against budget and inform your operational teams of expected activities to schedule resources and procure deliverables.

Trouble is, there may be a headcount freeze and until your business development actions bring in more revenue, you can’t justify another full time employee.

So here’s the solution: speak to the team at YellowsBest about a day-rate for a flexible, Bright individual who can take care of immediate activities in an Expert way, delivering against SMART objectives in a Timely fashion.

We look forward to hearing from you.

News and Views

This blog has been started for 2016 in order to add more information to the YellowsBest website in an informal manner. Always keen to receive feedback on whether anything else is needed.